“Envelope Basics: Measuring – Part 2” is part of an occasional series titled “Envelope Basics” that provides an in-depth look at all-things envelopes – elements, measurements, ordering tips and more*.
Last week, we looked at the correct way to measure an envelope. This week, we’re going to elaborate on envelope window measurements, so you’ll be completely and confidently prepared to give proper specifications for your next mail campaign. Remember: providing accurate information at the start of the project helps your campaign run smoothly and can help you avoid unexpected delays.
You can find examples of custom window envelopes here.
An envelope’s window position is measured by the distance from the left side and the distance from the bottom of the envelope. The envelope’s window size is always indicated as height by width, regardless of the window’s orientation.
How to Measure an Envelope Window
- Orient the Flap
- Measure Window Placement
- Determine Window Size
- Identify Window Orientation
- Specify Window Design
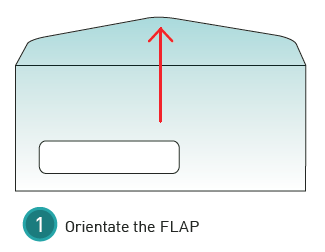
Step 1. Orient the Flap
Before measuring for window placement, the envelope should be oriented so the flap is at the top. This is essential whether it’s an open side or open end envelope.
Step 2. Measure Window Placement
Window placement is measured from the left first, and then from the bottom of the envelope.

Step 3. Determine Window Size
Window dimensions are listed vertical by horizontal and reflect the window opening versus the window patch.

Step 4. Identify Window Orientation

While most windows are horizontal formats, it’s good practice to specify horizontal or vertical orientation. Horizontal windows are parallel to the bottom of the flap and the vertical measurement is shorter than the horizontal measurement. Vertical windows are perpendicular to the bottom flap and the vertical measurement is longer than the horizontal measurement.
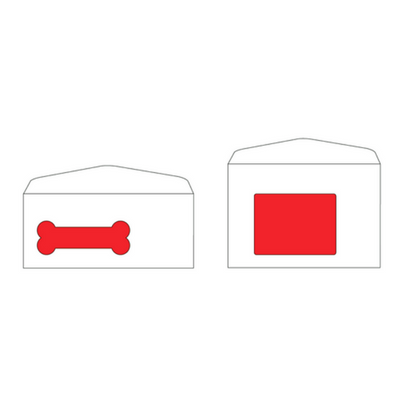
Step 5. Specify Window Design

Envelope windows are available in a variety of shapes and sizes, and can be used to attract attention. Windows can be custom specified according to a design request (e.g. dog bone window opening).
Download Our Guide 
Envelope Basics is a complete guide that details everything you need to select, measure and order the right envelope for your mail campaign.
Whether you’re a seasoned mailer or new to the mail industry, Envelope Basics includes helpful tips for your business or organization. Download your copy of Envelope Basics here.
As always, your Tension sales representative is happy to work with you to ensure accurate window and envelope measurements. You can also reference our guide, “Envelope Basics: Measuring” on SlideShare for more details. Contact us today to discuss more about your project and envelope sizes.
*This blog is intended for informational purposes only. Exact envelope and/or print specifications should be discussed in detail with your sales representative.